Current Projects

0 Members and 1 Guest are viewing this topic. Read 15016 times.

mlundy57

  • Industry Participant
  • Posts: 3579
Re: Current Projects
« Reply #20 on: 2 Sep 2014, 11:43 pm »
The veneer came in today.  Here are some pictures of the wormy maple a.k.a. "ghost" or "Ambrosia" maple


I started working on the grill frames today. I'll get some pictures up once I finish the frames.

Mike

ebag4

Re: Current Projects
« Reply #21 on: 2 Sep 2014, 11:54 pm »
That is going to look fantastic, great veneer.

Captainhemo

Re: Current Projects
« Reply #22 on: 3 Sep 2014, 12:36 am »
That is going to look fantastic, great veneer.

Agreed , very  nice  man   :thumb:

-jay

mlundy57

  • Industry Participant
  • Posts: 3579
Re: Current Projects
« Reply #23 on: 3 Sep 2014, 12:49 am »
It's going to be interesting. This is the first time I have worked with holes as big as the worm holes in this veneer.  Not exactly sure what to fill them with. 

One suggestion was Bondo with white hardener so it would cure grey then the holes would blend in.

Another was to use joint compound dyed black. This would make the worm holes stand out but I'm uncertain if the joint compound would shrink when it cured and be bonded well enough to stay put in the larger holes

Any body out there ever worked with this veneer before and have any suggestions?

Mike

Doublej

  • Full Member
  • Posts: 2688
Re: Current Projects
« Reply #24 on: 3 Sep 2014, 01:00 am »
I don't know squat about veneer but this guy seems to know how to fill holes in veneer. YMMV.

http://www.alliedlutherie.com/filling_a_hole.htm

Danny Richie

Re: Current Projects
« Reply #25 on: 3 Sep 2014, 04:28 pm »
When I filled holes in Mappa Burl veneer I used a dark wood filler putty. It worked out pretty well.

mlundy57

  • Industry Participant
  • Posts: 3579
Re: Current Projects
« Reply #26 on: 8 Sep 2014, 11:43 pm »
I'm trying something a little different for me on the CS-Encores. I have rounded over all four of the long sides so I will be wrapping the veneer all the way around the speakers and putting a seam in the back.

For those of you who have done this before, and especially if using HeatLock glue and an iron, how do you get a tight seam in the back that looks good? I have practiced it on a speaker enclosure I use for this purpose with walnut veneer and ended up with a gap in the seam.

Mike

ebag4

Re: Current Projects
« Reply #27 on: 8 Sep 2014, 11:58 pm »
Hi Mike,
I am far from an expert and probably broke all veneering rules, but this is what I did using heat lock to get the Sapele triangle in my V1 crossover covers:


What I did was cut the "V" in the Maple veneer and applied it with heatlock.  I then cut out the filler piece a little larger than needed and ironed it down making certain to get really tight up against the maple underneath.  After that I sanded the extra Sapele off until I reached the Maple below.  Not textbook but worked for me. 

For your scenario I would get one seam where you want it, work your way around and overlap just a bit, finish by carefully sanding the excess.

I should note that I was using raw veneer, if using backed all bets are off.

Good luck!

mlundy57

  • Industry Participant
  • Posts: 3579
Re: Current Projects
« Reply #28 on: 9 Sep 2014, 12:24 am »
I'm using a veneer with a 22.2 mil laminated backing. This makes the veneer more flexible, easier to roll around the edges, and more forgiving where the cabinet surface is concerned.

On my practice piece piece, I overlapped the two edges, put a straight edge on top, and used a veneer saw to cut through both pieces of veneer. Usually this gives a tight, almost invisible seam bot the heat from the iron caused the veneer to shrink and I ended up with about a 1/32" crack between the two pieces of veneer.

Mike

Danny Richie

Re: Current Projects
« Reply #29 on: 9 Sep 2014, 02:09 am »
What I used to do was to put a strip of wax paper down the middle of the cabinet on the back side. I'd then roll the first layer over it. The wax paper would keep it from sticking to the contact cement under it. Then lay wax paper on top of it and fold the other side over it. The wax paper will keep the second layer from sticking to the first. I'd then lay a metal ruler over them and line it up to where I want the seam to be. Then with a sharp blade cut through both of them at the same time. Then open it all up and discard the excess.

Hank

  • Full Member
  • Posts: 1206
    • http://www.geocities.com/hankbond1/index
Re: Current Projects
« Reply #30 on: 9 Sep 2014, 11:21 am »
What Danny stated.

mlundy57

  • Industry Participant
  • Posts: 3579
Re: Current Projects
« Reply #31 on: 10 Sep 2014, 01:53 am »
I did another test run today combining what you all suggested and a tip from the Joe Woodworker website addressing this issue with Heat Lock glue and the iron on technique.

The wax paper helped a lot even though this glue is not contact cement. I taped a piece of wax paper across the center of the back panel to keep the starting edge of the veneer from sticking where the seam was going to be but allowing the top couple of inches to stick down so I could roll the veneer over the first edge.  Then I continued ironing the veneer down and around the edges as usual until I got back to the rear panel.  Then I added the second piece of wax paper over top of the first piece like Danny suggested. Then I ironed the veneer around the last edge making sure the first couple of inches were stuck down so the veneer laid flat across the back.

At this point I incorporated the suggestion from Joe Woodworker. I put a straightened out piece of coat hanger under the veneer then overlapped the first piece. Then I used a straight edge to guide my veneer saw as I cut through both pieces of veneer. 

Next I finished ironing down the first piece of veneer. Then I placed the coat hanger wire about 2" from the seam then ironed down the seam.  Then I removed the coat hanger which left a small bubble the length of the piece of veneer. I finished ironing down the last part of the veneer. This flattened out the bubble and pushed the seam closed.

This left the edge a little proud just like ebag4 described. After letting the glue cure for a couple of hours, I went over the back with 120 grit sandpaper on a random orbital sander and seam came out tight and smooth.

Thanks a lot everybody for your suggestions.

Mike

mlundy57

  • Industry Participant
  • Posts: 3579
Re: Current Projects
« Reply #32 on: 12 Sep 2014, 02:43 am »
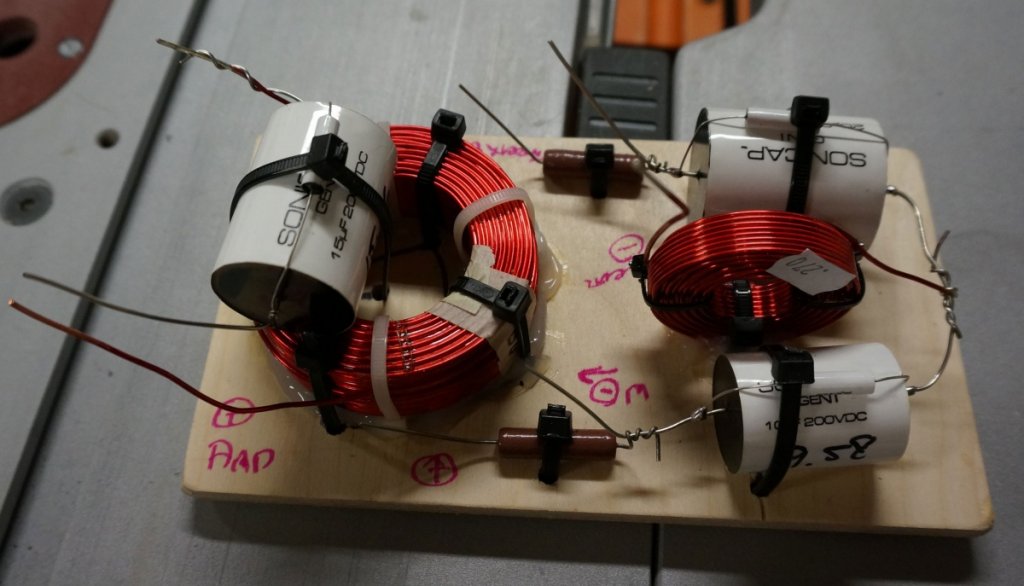
Time for some more pics. I'll start with the crossover networks.

I have done a side by side comparison between one pair of X-LS Encores using upgraded (Sonicaps & Mills resistors) circuit boards and a second pair of X-LS Encores with point-to-point wired networks (additional upgrade to Erse XQ inductors).  The additional expense is very minimal and I much preferred the sound of the point-to-point wired networks. So, like the last time, I decided to fully upgrade and point-to-point wire the crossover networks. I also put Sonicap Gen II by-pass caps in both the woofer and tweeter circuits. About the only thing I didn't do was use platinum by-pass caps

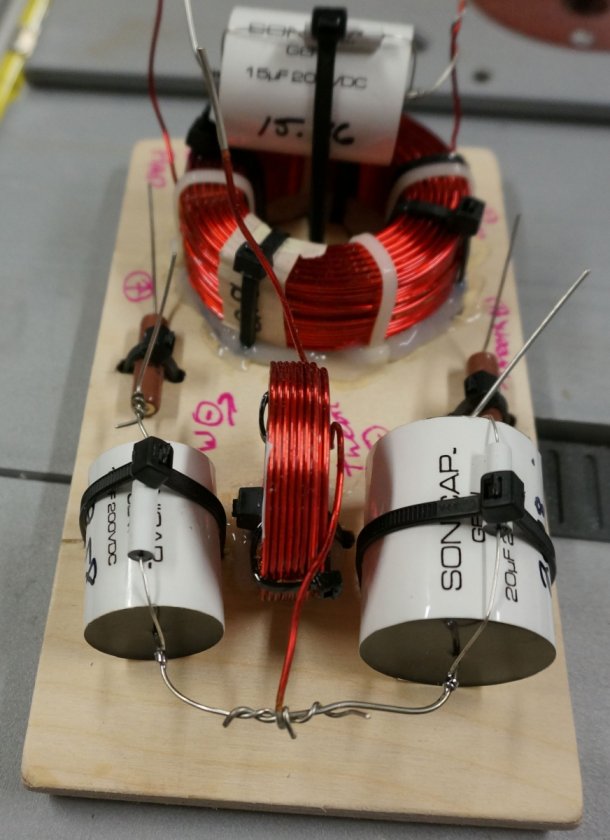
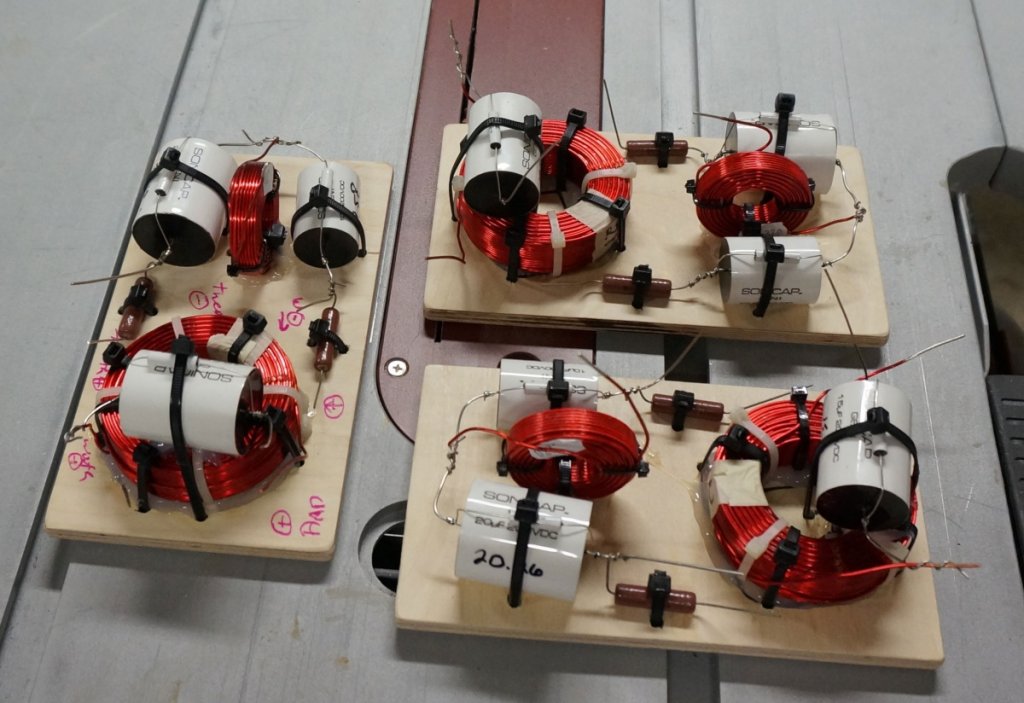
I decided to use a layout and board size that would work with both the CS-Encores and the MTM Encores.  At this point the by-pass caps are soldered to the caps (I do this first because it's easier), the parts are attached to the boards and the connections are twisted together. 


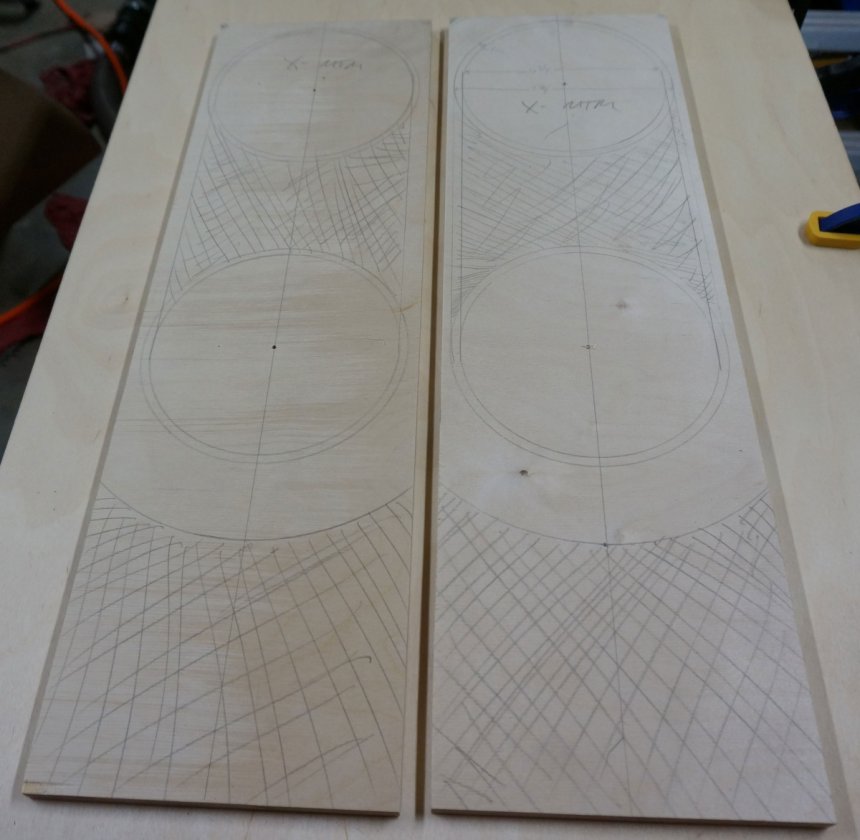
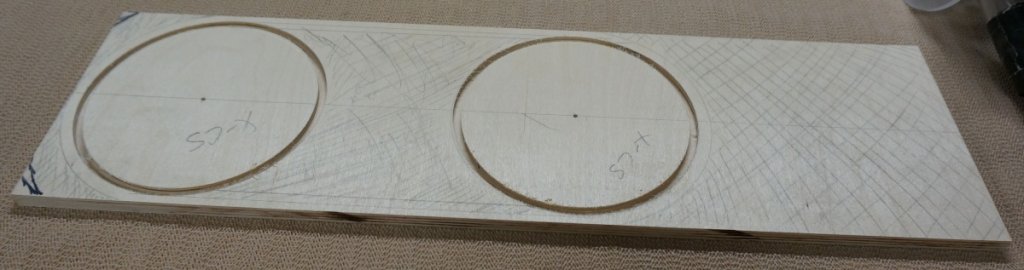
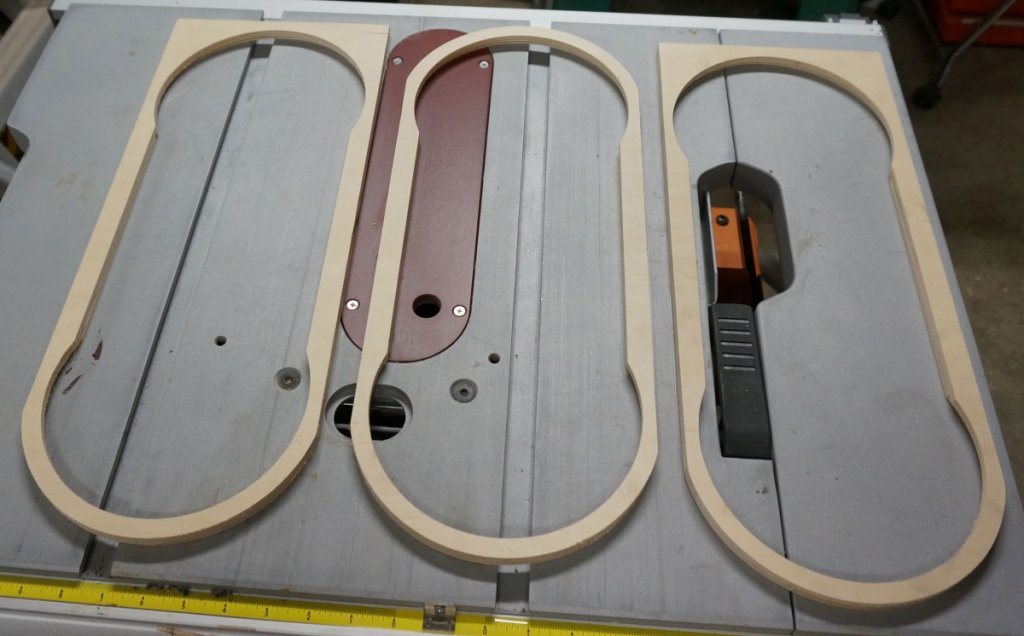
Next I started working on the grill frames. This was necessary at this point so I could install the magnets in the front baffles before putting the veneer on. Here is a picture of the grill frames for left and right CS Encore mains laid out ready for cutting.


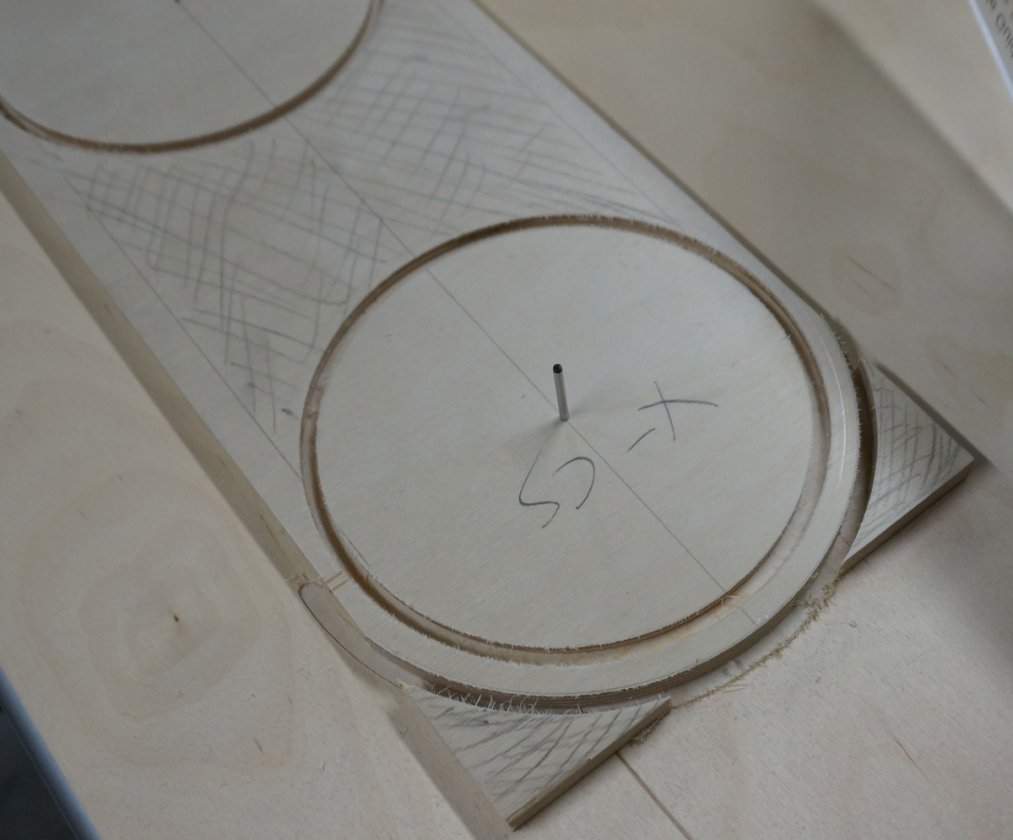
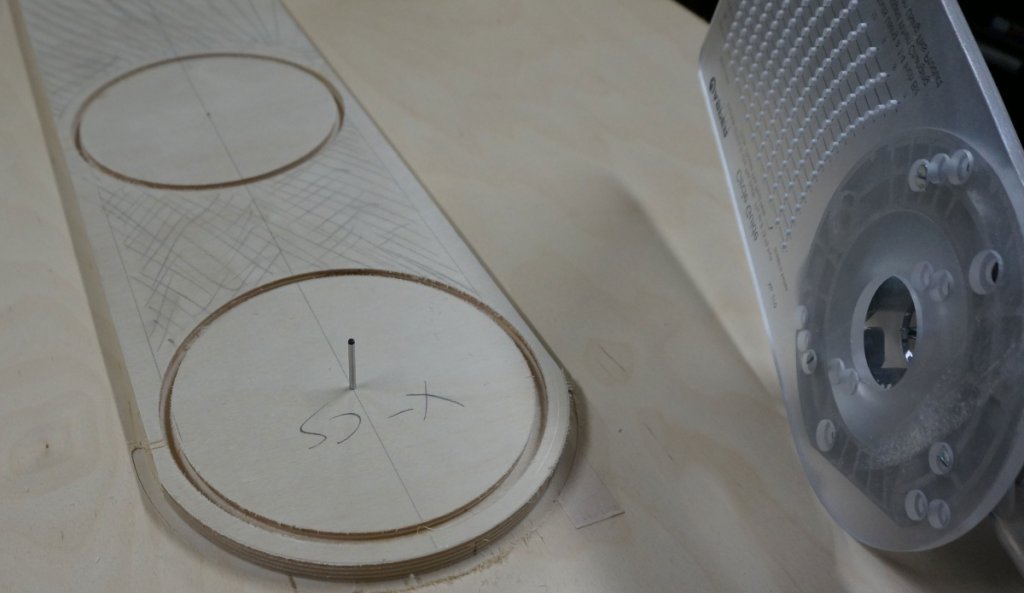
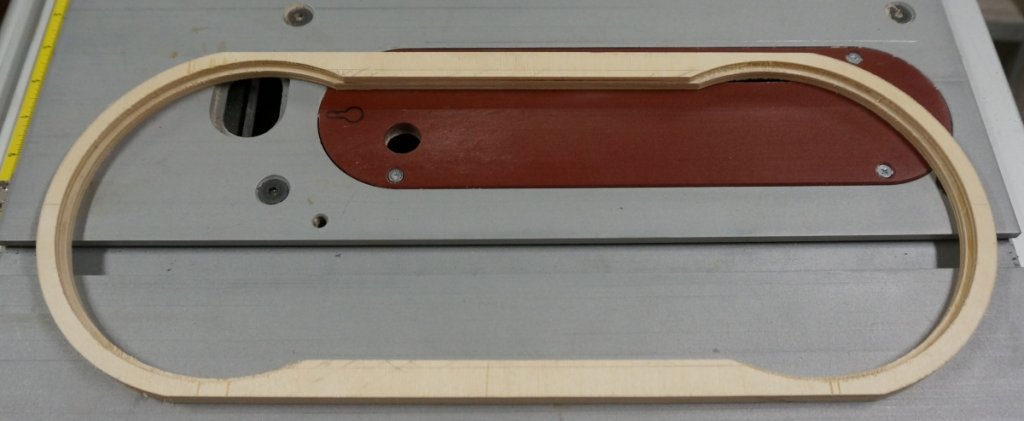
Here are a few pics of the frames being routed out and shaped


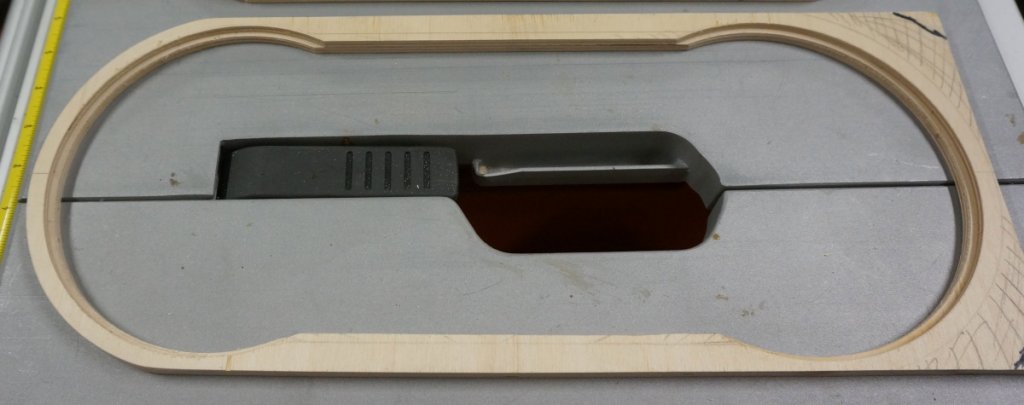
Here are a few after cutting the centers out on the table saw. The trick here is to set the blade depth to just a little over half the thickness of the frame. That way you get a clean cut without the blade cutting into parts of the frame you don't want cut.


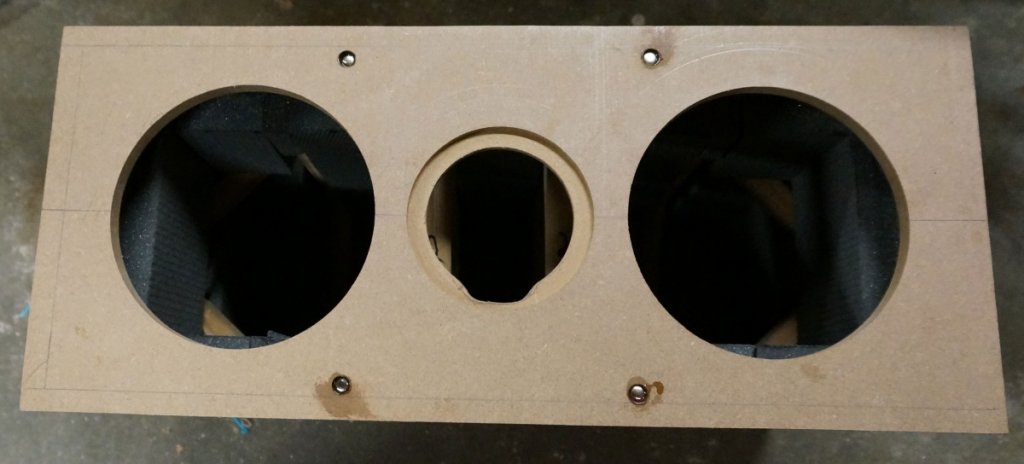
Next I decided where I wanted to put the magnets and drilled holes in the frames using the drill press. After the holes were drilled I inserted dowel points into the holes so I could mark the location on the front baffles. Scotch tape came in handy for holding the dowel points in place.


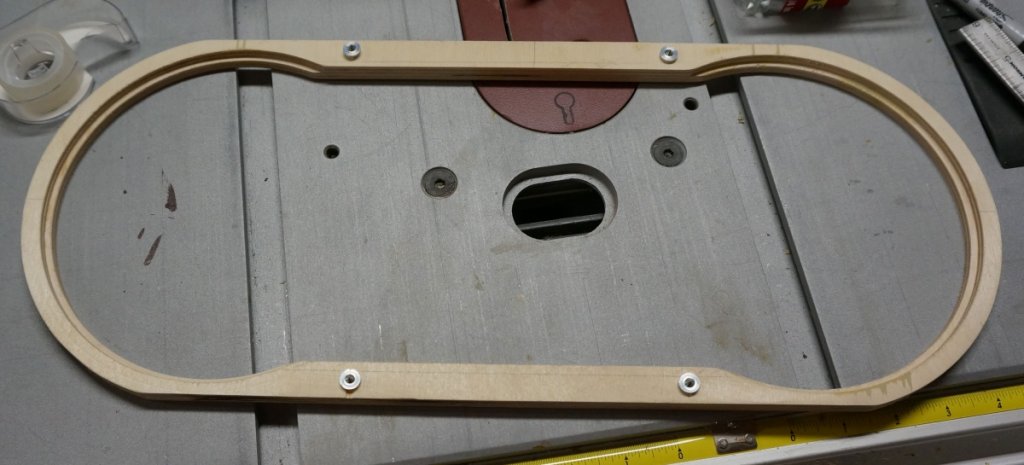
Next I lined the grill frames up on the front baffles where I wanted them and used a rubber mallet to transfer the magnet locations to the front baffles.


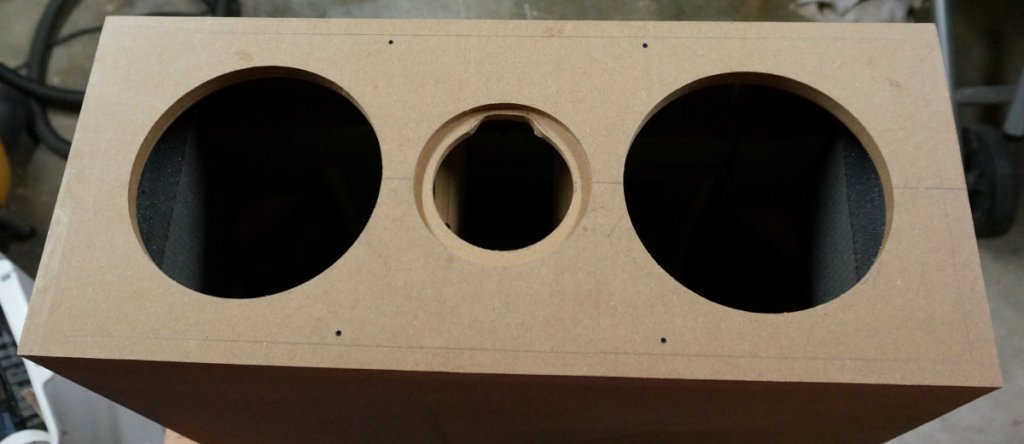
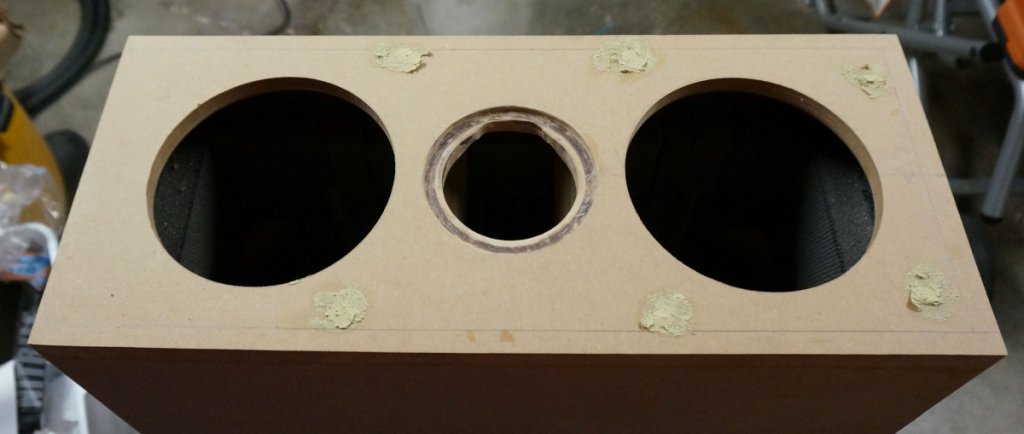
Then I used a Forstner bit to drill out holes for the magnets and CA glue to hold them in place


After that was done I filled in the holes with wood filler.


After the filler dried I sanded everything flush. Here is picture of one of the mains (it's on it's side) with the grill frame attached by the magnets


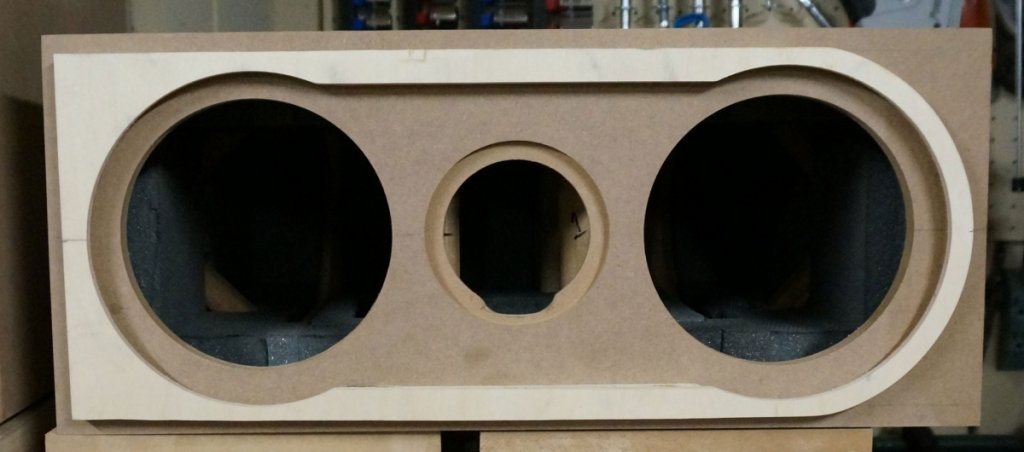
I used N52 neodymium magnets, 1/4" x 1/4" in the frames and 3/8" x 1/4" in the front baffle.

The frames are not finished yet. I need to round off the top corners and put 3/8" roundovers on the flat portions.  Then they will be stained black with India Ink and have black grill cloth stretched over them.

Mike

Captainhemo

Re: Current Projects
« Reply #33 on: 12 Sep 2014, 05:22 am »
You do nice  work man  :thumb:

I'm going to have to get myself a doweling accessory kit and start using the  dowel pointers like  you've shown instead of drilling the through holes in my frames  to mark  the magnet locations in the cabinet like I have been doing

-jay.

mlundy57

  • Industry Participant
  • Posts: 3579
Re: Current Projects
« Reply #34 on: 17 Sep 2014, 02:01 am »
Next batch of pictures:

Here are a couple of the X-CS Encores wrapped with the Ambrosia Maple veneer. The wet looking area is where I have applied a coat of shellack to seal the veneer before I apply the glue for the top of this speaker. This is to prevent any glue from getting on the already applied veneer and messing up the finish. This shellack will be sanded back to bare wood when the speaker gets preped for finishing.


In addition to the worm holes, Here is a pretty big void where a knot was. Not sure what I'm going to do with this. I may inlay crushed turquoise and/or red coral.


Mike

mlundy57

  • Industry Participant
  • Posts: 3579
Re: Current Projects
« Reply #35 on: 21 Sep 2014, 05:39 pm »
Ahhhh, oops!!  :oops:

Even though I was trying diligently to keep everything straight when laying out the grills. After applying the veneer I attached the frames to the cabinets and one of them didn't line up. It turns out I got the polarities of two magnets on one of the grill frames reversed.

Not a total disaster, I could always make another grill frame but I wanted to try and save this one.

I had put 1/4" diameter magnets in the frame. Now I just happen to have a 1/4" plug cutter. I wonder  :scratch:. Turns out the plug cutter perfectly cut the magnets out of the frame. One item of note: I never plugged the drill press in during the extraction process. I turned the chuck by hand to cut the magnets out.

Of course I now had much bigger holes in the frame. I increased the diameter of the magnets to 5/16" (I didn't have any 3/8" diameter magnets or I would have used them). I used medium viscosity CA glue to stick the new magnets to the bottom of the hole. After that dried, I packed sawdust around the magnets up to about 1/16" from the top and applied thin viscosity CA glue until the sawdust wouldn't soak up any more.  I let that dry overnight then used wood filler to fill up the holes. After sanding, the grill frame is as good as new and it now lines up properly on the speaker.

Unfortunately, I was a little ticked off at myself when I discovered this so I didn't think to take pictures to document the process.

Mike 

Peter J

  • Full Member
  • Posts: 1876
  • Hmmmm
Re: Current Projects
« Reply #36 on: 21 Sep 2014, 06:47 pm »
That's bummer, Mike. FWIW, I've been there, done that and so have many others, I'm sure.

If it's of any value to you, in one of my build threads, I outlined the way I do these now, which mitigates the possibility. I can find it if you like.


Captainhemo

Re: Current Projects
« Reply #37 on: 21 Sep 2014, 08:01 pm »
That's bummer, Mike. FWIW, I've been there, done that and so have many others, I'm sure.

If it's of any value to you, in one of my build threads, I outlined the way I do these now, which mitigates the possibility. I can find it if you like.


I'd be interested in reading that Peter  if you find the thread

-jay

mlundy57

  • Industry Participant
  • Posts: 3579
Re: Current Projects
« Reply #38 on: 21 Sep 2014, 08:12 pm »
That's bummer, Mike. FWIW, I've been there, done that and so have many others, I'm sure.

If it's of any value to you, in one of my build threads, I outlined the way I do these now, which mitigates the possibility. I can find it if you like.


Peter,

Sure thing, I'm always open to ways of doing things easier or better.

I thought for sure I had a no miss solution this time. After drilling all the holes I randomly installed the magnets into the baffle. Once the glue had dried I stuck a second magnet to each one. The second magnets were the ones that would go into the grill frame.

Then, one at a time I transferred each magnet to its corresponding hole in the grill frame being careful (I thought) to make sure the end of the magnet I saw went into the bottom of the hole which would keep polarity intact. However, I still managed to get 2 (out of 18) magnets on the three CS-Encore frames turned around.

I still have 4 MTM Encore grill frames to mate with cabinets.

Mike

Captainhemo

Re: Current Projects
« Reply #39 on: 21 Sep 2014, 09:22 pm »
Mike, when  you've got the 2nd magnets  stuck to the ones in the cabinets,  just take a black marker and  dab the exposed ends.  When  you install them in the frames, make sure the black end gets the glue and  goes  in first, just adds a bit more insurance yo don't accidently flip one around.
Of course, if you happen to  stick a magnet inthe  wrong hole, all bets are off !!

-jay