LGK Wedge and Bass Unit Build

0 Members and 1 Guest are viewing this topic. Read 25116 times.

mlundy57

  • Industry Participant
  • Posts: 3577
LGK Wedge and Bass Unit Build
« on: 27 Jun 2015, 01:05 am »
The second project I'm working on is a pair of LGK Wedges and bass units. The plan is to use the wedge shaped bass units once Danny get's them up and running and any kinks worked out.

As those of you who have followed the original Wedge thread know, there are no parts to cut for the LGK Wedges. A flat pack is part of the kit.  I won't be cutting any wood until I start on the bass units.

Normally I veneer my cabinets but the person these speakers are being built for wants them painted gloss white. Due to the very high quotes I received for getting all six pieces (2 LGK Wedges, 2 bass units and 2 amp boxes) painted, it was decided I would paint them. So I ordered a Spray Port HVLP spray system and have spent part of the last two days building a spray booth and rotating work station.

Since these speakers are going to be painted, once they were glued up I needed to stabilize the seams so they won't show through the paint. To do this, I cut a groove along each seam then filled this with Bondo glass which is a fiberglass reinforced Bondo.  Due to the shape of the Wedges and already having the front edges rounded over I didn't want to try using a router to cut the grooves. So instead, I used handheld wood carving tools to gouge out the grooves then sanded them with 80 grit paper to feather the edges and rough up a surface for the Bondo to bind to.


Then I applied the Bondo glass


Once the Bondo glass dried it was sanded down using 80 grit paper. Then glazing putty was applied to fill in the scratches and any pin holes and small voids in the Bondo


After sanding this down I had to apply a second coat of the glazing putty to some of the seams.

More pics to follow

Mike

Outofthewoods

  • Industry Participant
  • Posts: 980
  • Fallen Enclosures, Inc. Crafted with Passion
Re: LGK Wedge and Bass Unit Build
« Reply #1 on: 27 Jun 2015, 01:17 am »
Those will look great in gloss white! :thumb:

Pearl white is pretty, too. A little more tricky as it's a tri stage finish, but the results are worth it.

Here's a pearl face-plate I did for one of Gary's customers a few years back.

Best,

Ruben


mlundy57

  • Industry Participant
  • Posts: 3577
Re: LGK Wedge and Bass Unit Build
« Reply #2 on: 27 Jun 2015, 01:30 am »
Ruben,

That's sharp. I think I'll hold off on the pearl for awhile. The plan is Bullseye 1-2-3 primer, General Finishes Snow White milk paint, with General Finishes High Performance Gloss poly topcoat. The High Performance is a water based poly so it won't yellow over time and the white will stay white.

I'll paint up some sample pieces first to make sure the color is what the client wants.

mlundy57

  • Industry Participant
  • Posts: 3577
Re: LGK Wedge and Bass Unit Build
« Reply #3 on: 27 Jun 2015, 02:32 am »
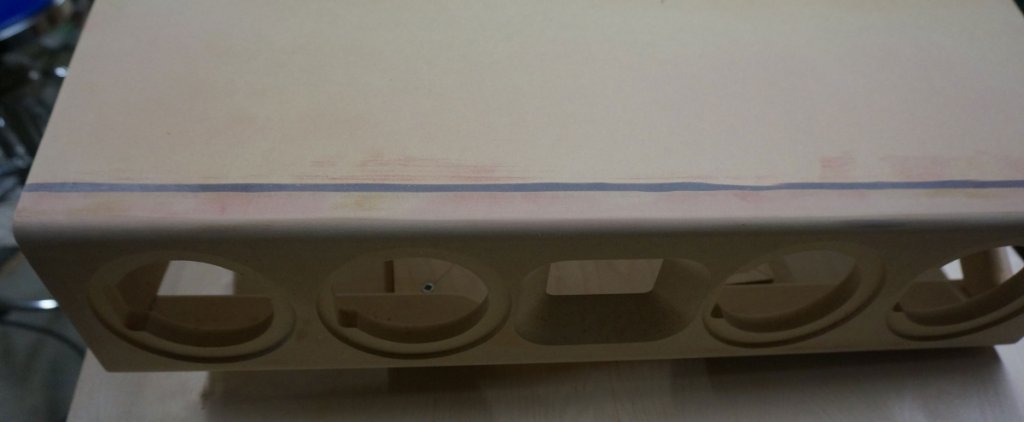
Here's after the glazing putty has been sanded off


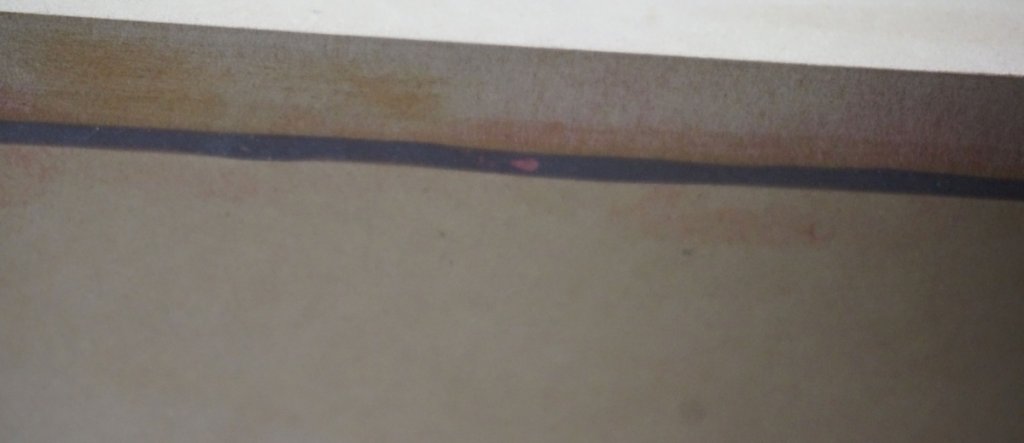
Here's a close-up of the glazing putty filling small voids in the fiberglass filler


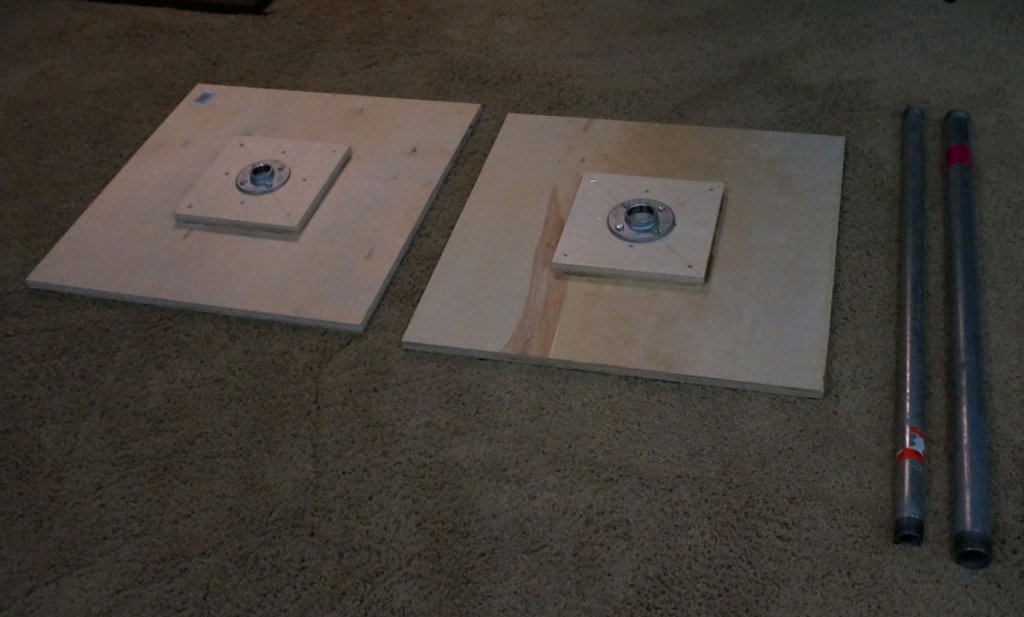
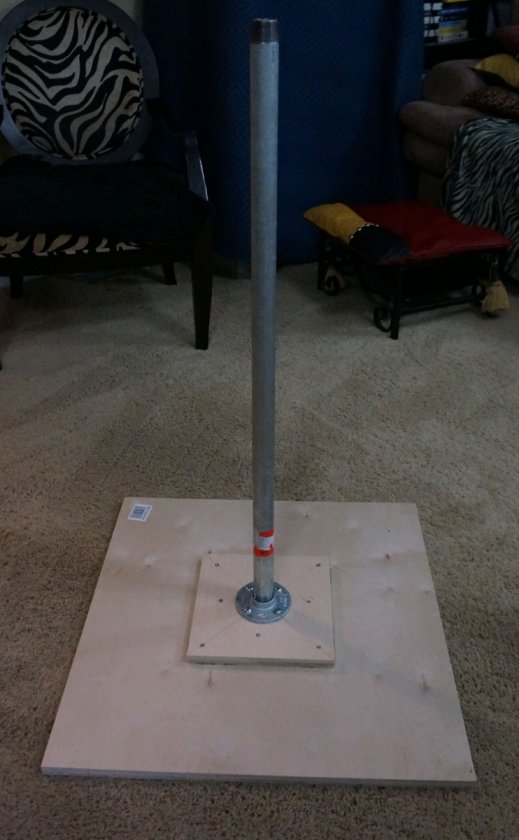
Here is the rotating painting stand.  It consists of two 2'x2'x3/4" pieces of plywood, two 9"x9"x3/4" pieces of plywood, a 1 1/4" pipe flange, a 1" pipe flange, a 1 1/4" x 3' piece of galvanized pipe, a 1" x 3' piece of galvanized pipe, glue, wood screws and eight 1/4" x 1 1/2" lag bolts.

The small pieces of plywood are centered then glued and screwed to the larger pieces of plywood.

The pipe flanges are attached to the small pieces of plywood with lag bolts.  That completes the assembly.

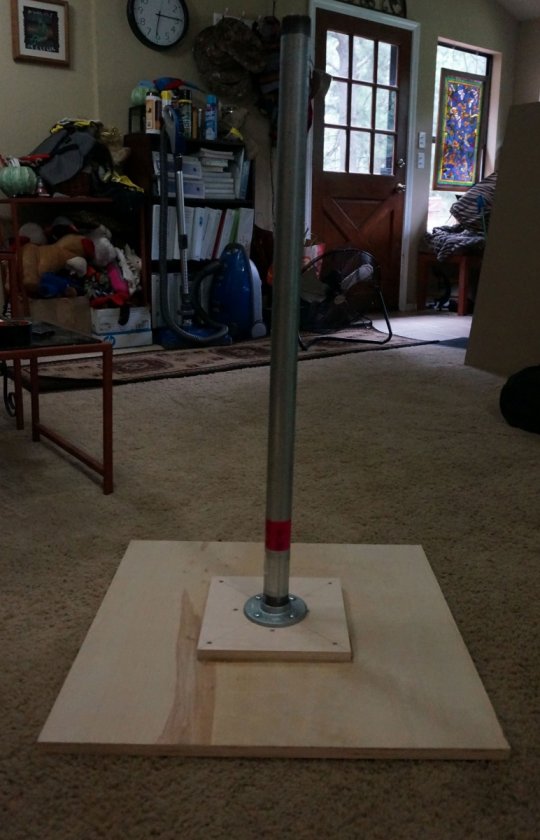
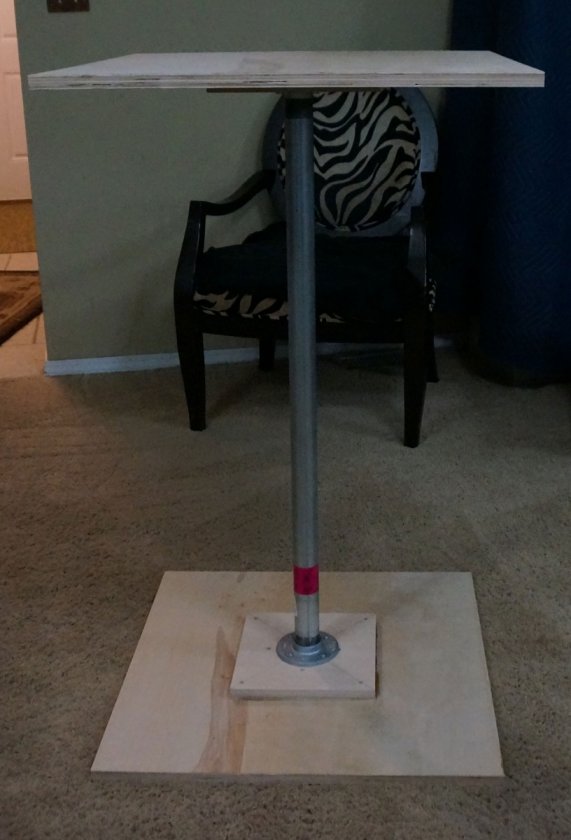
To use the stand, screw each piece of pipe into it's corresponding flange. Slide the 1" pipe inside the 1 1/4" pipe and the stand is ready to use. The 1" pipe fits snug enough inside the 1 1/4" pipe that there is no slop or side play but loose enough to turn easily.

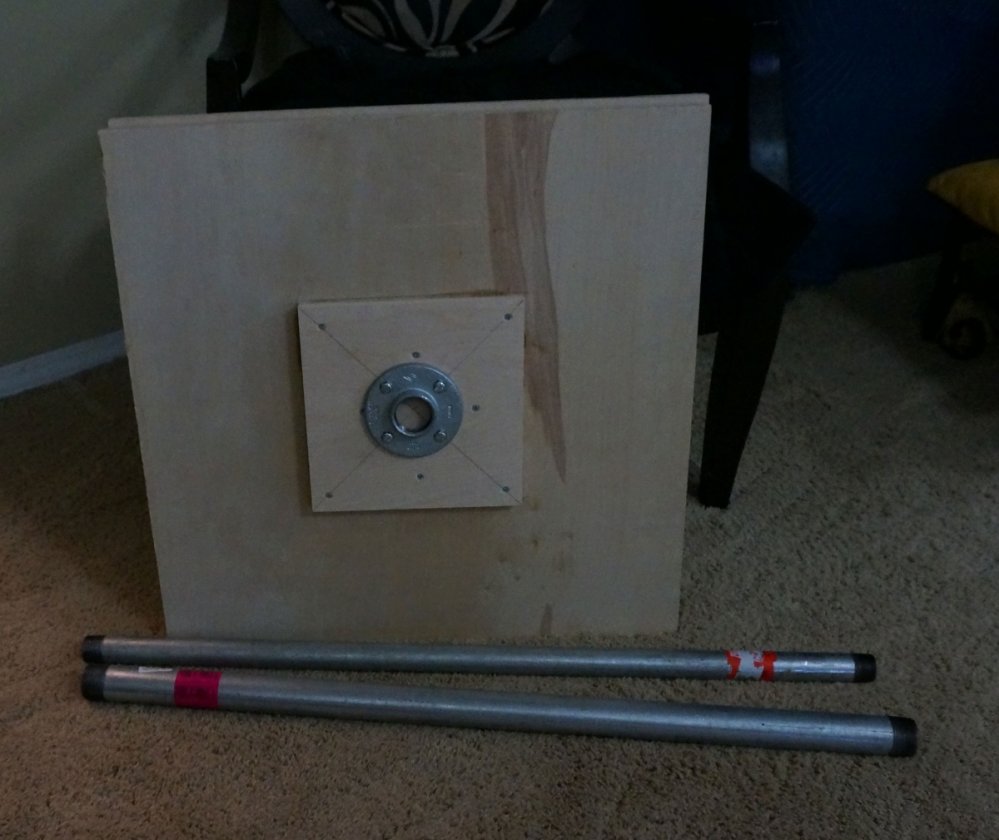
When you're done, pull the top piece out of the bottom piece, unscrew the pieces of pipe and put it away.

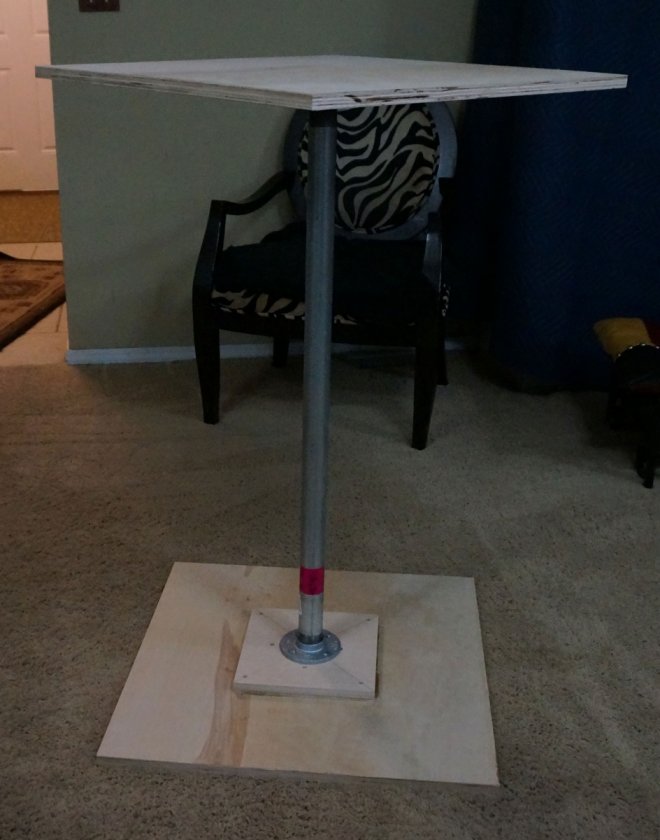
Here it is in pictures


Broke back down and ready to be put away


To change the height of the stand, just get longer or shorter pieces of pipe.  Not enough work surface? Use bigger pieces of plywood. The instructions I found for this stand used 48" round pieces of plywood.

I'll round the edges off later on.

Mike

Captainhemo

Re: LGK Wedge and Bass Unit Build
« Reply #4 on: 27 Jun 2015, 05:38 am »
Pretty  slick   Mike   :beer:

I think I am gong to try your method of dealing with seams on my next build .
Looking forward to seeing  more pics as usual

jay

Outofthewoods

  • Industry Participant
  • Posts: 980
  • Fallen Enclosures, Inc. Crafted with Passion
Re: LGK Wedge and Bass Unit Build
« Reply #5 on: 27 Jun 2015, 02:14 pm »
Is there a particular reason you prefer not to walk around a stationary piece? Short air hose perhaps?

Edit: I removed a comment as I actually read the entire post this time. :lol:

Best,

Ruben

mlundy57

  • Industry Participant
  • Posts: 3577
Re: LGK Wedge and Bass Unit Build
« Reply #6 on: 27 Jun 2015, 03:07 pm »
Is there a particular reason you prefer not to walk around a stationary piece? Short air hose perhaps?

Edit: I removed a comment as I actually read the entire post this time. :lol:


Best,

Ruben

The air hose is plenty long enough. The physical space I have to work in is not.  My spray booth is like the stand,  set up when you need it, take down and stow away when you don't. It is made up of 4'x6' pieces of cardboard for the front, sides and top with an opening cut in the front for the filter and fan

mlundy57

  • Industry Participant
  • Posts: 3577
Re: LGK Wedge and Bass Unit Build
« Reply #7 on: 3 Jul 2015, 09:54 pm »
I was finally able to get a coat of primer on the Wedges that I liked.  Sanding these things smooth is nothing like sanding a pair of box speakers.


I have added some black TransTint to the primer so my second coat will be grey. This will provide contrast between both the first coat of primer and the first coat of color.

Mike

Ron

Re: LGK Wedge and Bass Unit Build
« Reply #8 on: 3 Jul 2015, 10:11 pm »
  The Wedge's looking great Mike !  Nice job.  :thumb:

bdp24

  • Full Member
  • Posts: 884
Re: LGK Wedge and Bass Unit Build
« Reply #9 on: 4 Jul 2015, 12:29 am »
Mike, I have a question for you (and anyone else who wants to comment): How does cutting a groove at the seam and then filling the groove with putty stabilize the seam? Won't the putty-filled groove "telegraph" just as much as a seam, or perhaps even more because of it's larger size? And since a seam IS so much smaller than a groove, isn't it's telegraphing less noticeable? I thought the point of cutting a groove at the location of the seam was to avoid having to use putty, as the groove looks intentional, not like a telegraphing-seam which looks like a crack in painted MDF.

rajacat

  • Full Member
  • Posts: 3239
  • Washington State

Scott Trebble

  • Jr. Member
  • Posts: 35
Re: LGK Wedge and Bass Unit Build
« Reply #11 on: 4 Jul 2015, 01:43 pm »
I was thinking the wedgies should be a mirrored pair.  It looks like yours are 'open' on the same side  :scratch:

bdp24

  • Full Member
  • Posts: 884
Re: LGK Wedge and Bass Unit Build
« Reply #12 on: 4 Jul 2015, 02:06 pm »
I was thinking the wedgies should be a mirrored pair.  It looks like yours are 'open' on the same side  :scratch:

I had thought one of them is upside down, but the top and bottom are different.

mlundy57

  • Industry Participant
  • Posts: 3577
Re: LGK Wedge and Bass Unit Build
« Reply #13 on: 4 Jul 2015, 03:15 pm »
I was thinking the wedgies should be a mirrored pair.  It looks like yours are 'open' on the same side  :scratch:

You're right,

They are supposed to be mirrored pairs. Don't know how I managed that. That's the way the pieces fit together. Looks like I'm going to have to buy another flat pack and start over.

Crap!!!

Captainhemo

Re: LGK Wedge and Bass Unit Build
« Reply #14 on: 4 Jul 2015, 03:20 pm »
That's  no fun Mik  :(

Get Ben to send you  two lefts now(if they are indeed cut differently) or build them both  as lefts if not. Have a spare set ready  for your next customer  !

jay

mlundy57

  • Industry Participant
  • Posts: 3577
Re: LGK Wedge and Bass Unit Build
« Reply #15 on: 4 Jul 2015, 03:53 pm »
That's  no fun Mik  :(

Get Ben to send you  two lefts now(if they are indeed cut differently) or build them both  as lefts if not. Have a spare set ready  for your next customer  !

jay

Working on that

Mike

Tyson

  • Full Member
  • Posts: 11102
  • Audio - It's all a big fake.
Re: LGK Wedge and Bass Unit Build
« Reply #16 on: 4 Jul 2015, 06:01 pm »
You're right,

They are supposed to be mirrored pairs. Don't know how I managed that. That's the way the pieces fit together. Looks like I'm going to have to buy another flat pack and start over.

Crap!!!
Now you can set them up as rear speakers for full surround sound!  :P

mlundy57

  • Industry Participant
  • Posts: 3577
Re: LGK Wedge and Bass Unit Build
« Reply #17 on: 4 Jul 2015, 06:33 pm »
That's  no fun Mik  :(

Get Ben to send you  two lefts now(if they are indeed cut differently) or build them both  as lefts if not. Have a spare set ready  for your next customer  !

jay

I don't think many of the parts are left and right, you just have to be careful how you glue them up.

 :duh:  :duh:  :duh:

I have added a !!!!WARNING!!!! note on my Wedgie build instructions to make sure they are glued up in mirrored pairs

Now you can set them up as rear speakers for full surround sound!  :P

Guess I could but Danny went to all the trouble to design the O3's for surround duty for Neo3 based OB main speakers, it would be a shame not to use them in that role.  :thumb:

mlundy57

  • Industry Participant
  • Posts: 3577
Re: LGK Wedge and Bass Unit Build
« Reply #18 on: 4 Jul 2015, 11:23 pm »
Disaster averted  :hyper:

Ben was able to make up a complete flatpack. Since I currently have two Right speakers, when I get it I will build two Left speakers. That way I will have two complete pairs of Wedgie cabinets.

Mike

Captainhemo

Re: LGK Wedge and Bass Unit Build
« Reply #19 on: 5 Jul 2015, 05:38 am »
Cool he was able to help you out  Mike  :thumb:

I kind of  always figured the parts were the same but then when  you  mentined  that  they seemed to  fit together that way, it made me wonder if they were in fact different. 
No matter,  at least you have a solution

jay