Adding a binary amplitude diffuser template onto an absorption panel

0 Members and 1 Guest are viewing this topic. Read 15012 times.

jk@home

  • Full Member
  • Posts: 786
Has anyone here tried this? Basically a diy BAD panel, or similar. Either the flat or arced version? If the curved version, did you fill the empty back area between the hardwood holed template and the existing fiberglass panel with more fiberglass fill? Or not necessary? I will be trying this on my first and second sidewall reflection panels, which are presently 4" of OC 703.

Big Red Machine

Do you mean poly cylindrical or perforated?


jk@home

  • Full Member
  • Posts: 786
Either or both  :D  Either a flat board with the correct hole pattern, or the same, in a slightly wider width, so it can be bent into a poly. Looks like you have the latter?

Mike-48

This looks like a good thing to do. The trick is, where to get the perforated panel with the correct pattern? 

I've used the commercial BAD flat panels and found them excellent.


jk@home

  • Full Member
  • Posts: 786
I already have that covered. A few years ago a fellow (through this forum if I recall) had done the same, and sent me a PDF of the pattern and template size. So I sat on that info until recently. Carried the PDF on a thumb drive to a local commercial print/copy shop and they blew it up to the actual size to make a paper template. Charge me $17 for six copies  :D

Mike-48

Nice!

I have been thinking about 3D printers. I wonder how expensive a printer one would need to make a 24" x 24" perf panel.

mresseguie

  • Full Member
  • Posts: 4711
  • SW1X DAC+ D Sachs 300b + Daedalus Apollos = Heaven
Say, Mike.

Stereotypes Audio put me in touch with a local guy who makes all kinds of acoustic panels. I lost the number long ago but you could ask Teri, Howard, Rich or Nick(?) about it.

Enjoy!

Mike-48

Say, Mike.

Stereotypes Audio put me in touch with a local guy who makes all kinds of acoustic panels. I lost the number long ago but you could ask Teri, Howard, Rich or Nick(?) about it.

Thanks for the tip, Michael. (I don't think it's Nick. Nathan?)

jk@home

  • Full Member
  • Posts: 786
Nice!

I have been thinking about 3D printers. I wonder how expensive a printer one would need to make a 24" x 24" perf panel.

I guess if you already had something that could be set up to do a few panels...But if you are using someone's design (such as RPGs) you obviously can't make multiple panels for commerce. So you have to ask yourself  is it worth it?

In my case I will make 4-6 pieces, so will stack and line the 1/8" masonite panels up to drill all at once, and use one of those small hand drill press/chucks and drill, with a 1/2" forstner bit. That will be just a thousand or so holes  :lol:  Not too big of an investment.

This is basically an experiment for me. I have already tried regular polycylindricals (with no absorption) on the sidewalls, and I thought it added a little too much glare, went with 2x4x 4" thick absorption panels instead. Have read BAD ARC panels do well on the sidewalls, so giving it a go.


jk@home

  • Full Member
  • Posts: 786
Yes,  been there, gearslutz is a great resource. Have you built anything like this?


youngho

Hi JK, I haven't. I do have BAD panels, both flat and curved. I can't tell how the Arcs are constructed, since they're covered with Guilford Anchorage fabric.

Interesting commentary from Real Acoustix: http://www.realacoustixllc.com/blog-3/2016/12/1/the-gud-the-bad-and-the-fast

If you look at the RPG Expo (http://www.rpginc.com/product_Expo_Panels.cfm), this image (http://www.rpginc.com/images/featured/Expo%20Main%203.png) reminds me of the 2D Gik Alpha series panels (http://www.gikacoustics.com/product/4a-alpha-panel-diffusor-acoustic-panel-bass-trap/). Although the scatter plates are not normally available on their own, this author (http://www.dagogo.com/rebuilding-music-room-part-2/2) did seem to be be able to purchase them as such.

Young-Ho

jk@home

  • Full Member
  • Posts: 786
Thanks for the links. I will be using this grid layout:


All I'm going to do is mount some open end polycylindricals to the face of my existing absorption panels, with the above pattern drilled in.
Got enough materials, tools, drill bits etc. to move forward, if I like what I hear will post some construction pics.


jk@home

  • Full Member
  • Posts: 786
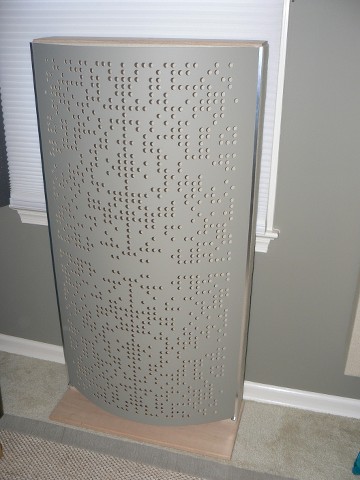
Finished the BAD add-ons, and am happy with the results.


Had a lot of mis-fires with this project. Started with 1/8" HDF from Home Depot, the stuff was a bear to drill, and in the end, couldn't handle the bend for the poly (started to crack down the center hole line). Was able to salvage a few pieces, to use as templates and for future flat panels.

Ended up recycling some manufactured solid poly panels I had bought a few years ago from an outfit out of Arkansas. I had used them with my Maggies, but didn't think they worked that well with the KEFs. They were up in the attic unused, already painted the room color and had a built in bend to them, ended up working perfectly.

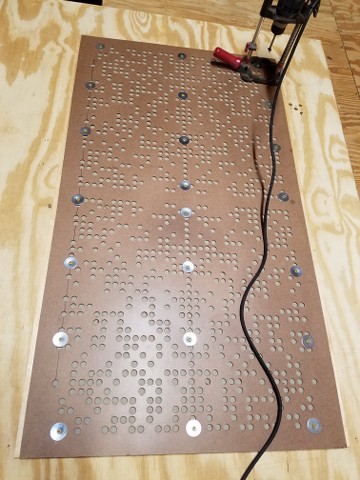
Here's one of the HDF panels that I used as a drilling template, screwed down on top of the other (birch?) poly panels, which in turn are on top of a sacrificial piece of plywood. I used a hand drill (using a 1/2" forstner drill bit) and hand drill press (all from Home Depot). The press is mainly used as a stop to control the drill depth. Took about 6-7 hours (not counting breaks) to do the holes. :roll:


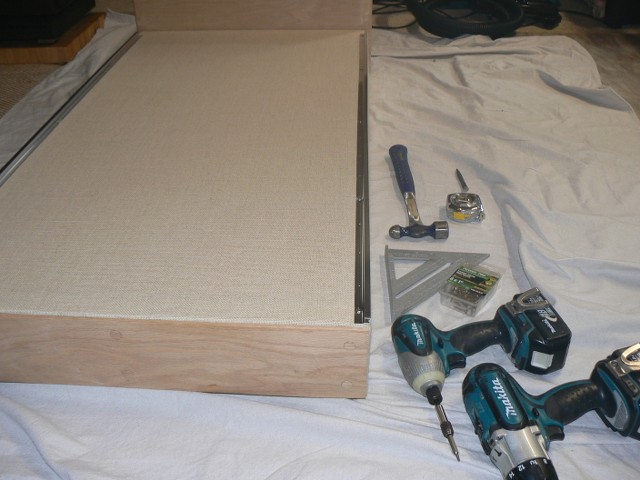
The panels I mounted these to had 3/4" sidewall frame construction with aluminum angle added for support. Detailed in this thread:

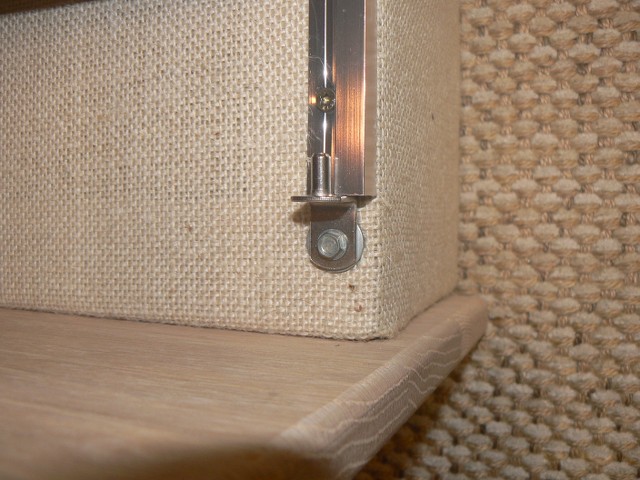
http://www.audiocircle.com/index.php?topic=113202.0

To catch and hold the sides of the curved panels, I mounted some of that aluminum channel that is used to hang bathroom mirrors on walls, to the existing panels. Added some nice metal cabinet shelf brackets on the bottom as a stop so the curved panels wouldn't slip down.


When I first tried these out, had them placed in the exact same location as the panel was as an absorber (centered to the mirror image of the speaker driver). Didn't sound all that great, lost some detail. Then I remembered reading an old Stereophile article about a particular curved diffuser being review, and how the reviewer ended up moving the panels a bit forward, so that the mirror image of the driver hit slightly pass the apex of the curve, closer to the listener. That did the trick. Got plenty of clear detail, but also new layers of depth. Pretty cool how a slight adjustment can make such a difference.

http://www.stereophile.com/content/acoustic-geometry-curve-system-room-treatments#Iq8UoUHwjucfG3Md.97

Update: After more listening, I felt that even though the BADs on the sidewall expanded the soundstage (especially with out of phase material), it also damaged and confused the high end a bit. So I have moved them on to the rear wall corner bass traps, facing towards the front wall and out of the RFZ. So that will give me diffusion and bass trapping on the front and rear walls, and just absorption on the sidewalls.


« Last Edit: 12 Apr 2017, 01:02 pm by jk@home »